Showing posts with label Getting Started. Show all posts

Friday, October 15, 2010

What does that Symbol Mean?

In Picasa’s Library view, there are many symbols/icons you may see on the picture thumbnails.  These are indicators of certain attributes of the pictures being marked.  They are not part of the picture – they are simply informational.  This article will discuss each one.


imageStarred: Shows that this picture has been marked as a Favorite picture.  See this article for a discussion of Stars and Tags.
image
imageUploaded: Indicates that this picture has been uploaded to your Web Albums.  You can right click on this picture and choose ‘Online Actions.’  This gives you options to: View Online, Copy URL, Update Online Photo, or Refresh Online Status
SyncSync’ed: This shows up on any picture in an album or folder that has been ‘Sync’ed’ to your Web Albums.  See this article about synchronized folders/albums with Picasa Web Albums.
imageMovie: This thumbnail is a Movie clip.  If you double-click it, the movie will play. Picasa will play any movie file type that is checked in Tools | Options | File Types
imageGeotagged: Indicates that this picture has latitude and longitude coordinates of the location where it was taken.  See this article on Geotagging.
imageBlock from Uploading: This indicates that you have marked this picture as one that Picasa should definitely not upload, even if it’s in a folder or album that is being synchronized to the web.  To do this for a picture, you right-click on it and choose “Block from Uploading.’

So, I have picture thumbnails in my Picasa Library that look like those below.  Notice the icons in the lower right – or lower left.  Each one is described below the picture:


image
This picture has been uploaded to Picasa Web Albums, and has been marked as a favorite.
image
This picture has been geotagged and will be properly placed on a map in Places view.
image
This one has been geotagged and uploaded
image
This thumbnail is a video clip.
image
This thumbnail is in a Sync’ed album or folder.  Therefore it is on the Web in addition to the computer.
image
This picture has been Blocked from Uploading and will not be on the web even if it is in a Sync’ed album.

When you double-click on a picture to see it in Edit/Single picture view, the symbols disappear from the picture itself.  Instead, they are displayed on the blue status bar below the photo.  That status bar starts with the folder and name of the picture file, then the date and size, the tags (if any) and at the far right you’ll see the icons for Star, Upload,

Mount Raniew
This tip brought to you by Geeks on Tour

Geeks on Tour is a membership website with hundreds of Tutorial Videos on topics of interest to travelers, such as managing digital photos with Picasa, Route-Planning with Streets and Trips, and sharing your travels with a website using Blogger or with friends on Facebook. You can subscribe to our free e-newsletters, or become a paid member and be able to view all of the videos in the Learning Library.

Members may want to view the following tutorial videos.  Not a member?  Join now.

Library View

Single Picture View

starring-pictures

Geotagging

Upload Photos to the Web

Add Captions to your Photos

Sync Photo Sort Order

make-a-movie


Tuesday, April 6, 2010

Where did my Pictures Go?

I’ve heard many people say they don’t know where Picasa puts their pictures.  I’m here to tell you that Picasa only puts pictures where *you* tell it to.  If you don’t tell it what folder to import your pictures to, they don’t get imported.

Here is Picasa’s Import screen.

importscreen

It gives you two places to specify where you want the pictures to be.

  1. Import to:

  2. Folder title:


Notice that, until you specify something in these boxes, you cannot import your pictures.  the ‘Import all’ and ‘Import Selected’ buttons are grayed out.  You can’t click on them.  As soon as you put something appropriate in the first 2 boxes, then the Import buttons become available.

File Drawer and File Folder


If your computer is your filing cabinet, then box #1 is the drawer, and box #2 is the folder where you want the picture stored (or #1 is folder and #2 is sub-folder).  Notice that box #1 reads ‘Pictures’.  That means, unless you change it, your pictures will be imported to the ‘Pictures’ aka ‘My Pictures’ area of your computer.  Then, you can create a folder within ‘My Pictures’ by typing something into box #2.

image
This means to import pictures into a *new* folder called South Carolina within My Pictures area.

Import to an Existing Folder


After you have created a folder, it will appear in the drop-down for the first box.  So the next day, when you’ve taken more pictures in South Carolina, you can just click on the ‘Import to:’ drop-down arrow and choose South Carolina from the list.

image

image

Now, you can leave the Folder title box blank and click ‘Import all’ or ‘Import Selected.’  Your pictures will be stored in Pictures\South Carolina\.

If the folder you want isn’t on the drop-down list, you can click ‘Choose.’  This will open up a dialog box where you can navigate to any folder on your computer.

Picasa is just your Tool


You can tighten a screw with your thumbnail, or you can use a coin, or you can use a swiss army knife, or you can use a Craftsman screwdriver or a Stanley screwdriver.  They are just different tools for accomplishing the same task.  Once you learn to use a screwdriver – you will probably prefer it.  But the screw doesn’t care – it gets tightened regardless what tool you use.

Picasa is just a tool – it doesn’t actually store your photos – it just helps you put them where you want.  You don’t need to use Picasa to get pictures from your camera to your computer.  You can use the software that came with your camera, you can use the software that came with your computer.  Picasa doesn’t care how the pictures get onto your computer.  As long as the pictures are in a folder that Picasa is watching (see Folder Manager) then Picasa will display them for you.

You can even completely remove Picasa from your computer if you should decide you don’t like it.  Your pictures will remain in whatever folder you put them.
This tip brought to you by Geeks on Tour

Geeks on Tour is a membership website with hundreds of Tutorial Videos on topics of interest to travelers, such as managing digital photos with Picasa, Route-Planning with Streets and Trips, and sharing your travels with a website using Blogger or with friends on Facebook. You can subscribe to our free e-newsletters, or become a paid member and be able to view all of the videos in the Learning Library.

Members may want to view the following tutorial videos.  Not a member?  Join now.


Tuesday, February 2, 2010

Importing and Folders

I’ve written (and said on video) many times that, when I import pictures from my camera, I like to Import All into a folder for the current month.  Two points to be made here:

  1. Import All: It’s just a one-click, no choices method.  This way, I know that I’m getting all the pictures from my camera card – I can delete any bad ones later in Picasa.  If instead, I selected photos to import into separate folders, I may miss some pictures by accident.  Also, after importing all, I let Picasa delete them from the card.  This way I always have a fresh card for use in my camera.

  2. One folder per month: my first import at the beginning of each month requires me to make a new folder.  I just enter 201002 (Feb 2010) in the place for folder name.  Every subsequent import, I just use the drop-down list to select an existing folder for ‘Import To:’  It remembers the previous folders I have used.
    image


But, not everyone wants to use my system … they may have their own system – go figure!  Many people like to have their photos in folders by individual date – sounds like *way* too many folders to me, but to each his own  :-).  The latest version of Picasa can do this for you automatically, just click on the drop-down by ‘Folder title:’ and choose ‘Date Taken’ – that will automatically create folders for each date on your photos and import the photos into their respective folder:
image

Make New Folders after you Import


Sometimes I do want specific folders other than my main, monthly folder.  After I import my photos, I will select the one(s) I want in a new folder, right click and choose ‘Move to New Folder.’  Clicking on ‘Move to New Folder’ accomplishes two things, 1)it creates the new folder and 2)it moves the selected photos into it.  After that first step, you can now drag other photos into that same folder.

New Video on Importing with Picasa 3.5/6:


This tip brought to you by Geeks on Tour

Geeks on Tour is a membership website with hundreds of Tutorial Videos on topics of interest to travelers, such as managing digital photos with Picasa, Route-Planning with Streets and Trips, and sharing your travels with a website using Blogger or with friends on Facebook. You can subscribe to our free e-newsletters, or become a paid member and be able to view all of the videos in the Learning Library.

Members may want to view the following tutorial videos.  Not a member?  Join now.

Related article

http://picasatutorials.com/2009/02/picasa-tip-picasa-web-albums/
Need to learn the basics?  Check out our ‘Beginner’s Guide to Picasa’ complete withshow-me videos

Thursday, January 7, 2010

Five Deadly Sins of Picasa

Have you heard the one about the lumberjack who decides to turn in his trusty old axe for a new chainsaw?  After struggling for several days with the chainsaw and not felling even one tree, he decides to return it to the store.  He tells the salesman that the chainsaw doesn’t work and he wants his axe back.  The salesman decides to see what is wrong with the chainsaw so he starts it up.  The lumberjack jumps back with surprise saying, ‘What’s that Noise?’

Picasa is easy, but it’s not foolproof.  It’s important to take some time up front to learn how it works.  There are 5 things I keep seeing people do with Picasa that are wrong.  Because they don’t have a good foundation of understanding the program, they use tools the way they *think* they work, rather than learning how they really work.  The results is a mess.

  1. image Using the Import tool instead of the Folder Manager.
    As you collect more and more photos, I see people putting photos on an external hard drive.  This is a wonderful idea, BUT – when they open Picasa they use the Import tool to be able to see them.  The Import tool is meant to copy pictures from an external device (usually your camera) to your computer.  Now they have the pictures twice!  Once on the External Hard Drive, and again on their computer’s built-in Hard Drive.  What they should have used is the Folder Manager.  The Folder Manager tells Picasa to watch the pictures in their original location – not copy them.

  2. imageCreate an Album – then delete the original picture
    Picasa is designed to be an efficient manager of all your pictures.  You store your pictures in Windows (or Mac) Folders with some simple, logical storage system either by event or by month.  Without changing your folders, Picasa gives you tools to view your pictures in different ways.  The Album feature is a way to create different categories of pictures regardless of the folder in which they’re stored.  (Note: This is *not* Picasa Web Albums I’m talking about here … it’s just ‘Albums’ in the Picasa software on your computer.)
    So often, I hear people say, “I copied my picture into an album, then I deleted it from the folder.”  NO!!  The picture only exists once – and that is in the folder – albums are like playlists, they just point to the picture in whatever folder it is stored.  If you delete it from the folder … IT’S GONE.

  3. imageMoving pictures with computer tools outside of Picasa
    If you want to move pictures from your computer to an external hard drive, *don’t* do it with Windows Explorer (or Mac Finder.)  If you do, your Albums in Picasa will be destroyed.  Remember, an album is a list of pointers to pictures in their folders.  If you move a folder’s location the album pointer needs to know about the change.  PIcasa makes it very easy to move folders and, when you do it with Picasa, it will update all the album information to follow the new locations.

  4. imageUsing Export instead of Save
    When you edit a picture, Picasa doesn’t change the actual picture.  Picasa remembers all your edits and displays the picture to you accordingly, but if you look at the picture outside of Picasa you won’t see any of the edits.  To make a picture outside of Picasa that looks like the edited version, many people use the Export command.  This creates an entirely new picture … now they have two!  If they had used the Save command instead, it would have applied the edits to the one existing photo.

  5. image“I don’t Need Backups because I use Picasa”
    This one truly surprises me, but I hear it over and over.  People have heard that Picasa includes Picasa Web Albums and, for some reason they think that it automatically puts all your pictures on the Web Albums.  No, No, No.  Picasa is software on your computer, PIcasa Web Albums is a free online photo-sharing website that is a companion to Picasa.  First of all, even if you do upload your pictures to Picasa Web Albums, I don’t consider that a backup.  Picasa Web Albums is a method to share your pictures with friends and family.  You still want your original safe on your computer and backed up to CD/DVD or external Hard Drive. Secondly, Picasa doesn’t do anything automatically … it’s good, but it’s not magic!  Picasa includes a command to ‘Backup Pictures’ … it’s very easy … USE IT!


Standard links for Geeks
This tip brought to you by Geeks on Tour

Geeks on Tour is a membership website with hundreds of Tutorial Videos on topics of interest to travelers, such as managing digital photos with Picasa, Route-Planning with Streets and Trips, and sharing your travels with a website using Blogger or with friends on Facebook. You can subscribe to our free e-newsletters, or become a paid member and be able to view all of the videos in the Learning Library.

Members may want to view the following tutorial videos.  Not a member?  Join now.


Although Picasa is easy to use, it is SO important to understand how it works.  A little up-front time spent learning will save you so much time in the long run.  We have lots of resources to help:

Friday, December 11, 2009

Upgrading to Picasa 3.6

Yes, you heard right ... there IS  a Picasa 3.6 now.  You can view all the notes about what has changed at Picasa 3 Readme from Google.  You can get here from your Picasa menu.  Just click Help and Online Readme, or Release Notes.

There's no huge changes from 3.5.  The only real difference is the Import screen - you can now have it automatically import into a folder named with the date of the photos.


If you haven't upgraded yet, watch this video to see how.


The best way to learn Picasa is with our book, "Beginner's Guide to Picasa 3." It includes  Show-Me-How videos.

Thursday, November 12, 2009

More Help from Google on Picasa

Where do we (Geeks on Tour)  go when you all ask a question we can't answer?   We go to the Google Picasa Support Forum.  This is where thousands of people ask their questions about Picasa.  If you have a question, odds are that someone else has had the same question and there are also people on that forum who give great answers - including some folks from Picasa.

In addition to the users' forum, there are help articles on all the basic topics you need to know about Picasa.

Frequently Asked Questions


And, now there is a new addition - the Picasa Resources FAQ page. FAQs are just that - the questions that are asked most often in the forums and elsewhere.  If you're just getting started with Picasa, I highly recommend reading thru the FAQs.  You might get some questions cleared up before you even realize you have the question.

The FAQ page is maintained by the people who answer the most questions in the forum - the 'Top Contributors' - and we're proud to say that they see enough value in the Geeks on Tour videos to include a link to our site as well.  There is also a link to the Picasa YouTube channel.

Free Picasa Webinar


If you haven't registered for the webinar yet - there's still time. Here's the link.  This free live webinar will happen tomorrow, November 13 starting at 10 am Pacific time.  That's 11am Arizona time, 11am Mountain time, 12 noon Central time, and 1pm Eastern time.  Now that it's over, you can watch the Youtube recording of the webinar.

If you can't make it at that time, not to worry, it will be recorded and we will post the link here when it is ready.

Tuesday, November 3, 2009

Free Picasa Webinar by Google and Geeks on Tour

This Friday, November 13, you can watch a one hour Picasa Seminar on the Web.  Geeks on Tour will be in Mountain View, California to co-host this webinar with Google. 

You can check it out and register for the event by visiting the Picasa Help page. 

Here's the Webinar description:


New to Picasa? Want to learn how to edit and organize your photos? The Picasa team, along with Chris Guld from Geeks on Tour, will be hosting a free webinar tailored to Picasa newcomers. You will learn quick and easy ways to crop, add effects, change the coloring and improve your photos. Following the demo there will be a Q&A portion hosted by the Picasa team and Geeks on Tour. Hope you can join us!

Register for the event

Tuesday, October 6, 2009

Picasa 3.5 Import Screen

The latest upgrade to Picasa came out on September 23. They're calling it 3.5. The biggest change is in the 'Import Photos' screen. In the prior version, Import was on 2 screens; first you selected what you wanted to import (All, or Selected, Exclude duplicates or not) then the next screen asked where you wanted them - the folder specification. In Picasa 3.5 it's all on one screen. So, you have to specify the target folder before you click 'Import All' or 'Import Selected.' (Tutorial Videos: Import from Camera)

Notice in the screenshot below the Import From, Exclude Duplicates and Progress note are in the upper left. Everything else is at the bottom. Your procedure, therefore, goes from top, to bottom - then left to right.

Picasa 3.5 Import

A couple things to notice:

  • Picasa creates a folder name for you with the current date (2009-10-05 above.) You don't have to accept that - and you probably shouldn't. You can delete 2009-10-05 and type anything there that you want. I usually put all pictures in a folder for the month, so I put 200910 in that place. In the older version, it would remember the folder name where I put the last imported batch of pictures - I could just select 200910 from a dropdown list. It doesn't seem to do that anymore, but I can just type it in again and the pictures all go to the same place.

  • There is a new option to 'Upload.' This means that you can upload to your web albums at the same time that you import to your pictures on your computer. I would never do that, because I like to look at the pictures and do a little editing before uploading.


This tip brought to you by Geeks on Tour

Geeks on Tour is a membership website with hundreds of Tutorial Videos on topics of interest to travelers, such as managing digital photos with Picasa, Route-Planning with Streets and Trips, and sharing your travels with a website using Blogger or with friends on Facebook. You can subscribe to our free e-newsletters, or become a paid member and be able to view all of the videos in the Learning Library.

Members may want to view the following tutorial videos.  Not a member?  Join now.

Tuesday, September 15, 2009

Backup! Backup! Backup!

by Chris Guld of Geeks on Tour:

I sometimes feel like a broken record, telling people to backup their photos.  Just when I figure that *everyone* has the idea and I can rest, I read something like this post in the Picasa Help Group where someone lost 15,000 photos when their computer crashed.  !?#!!??@!!

How can anyone possibly collect that many pictures without at some point wondering, “What would happen if my computer crashed, or it got stolen, or it fell out of the car, or it burned up in a fire or … “

One of the biggest reasons that I recommend Picasa so highly is that it makes backups SO easy.  First, let me make sure we understand each other with the term ‘Backup.’  It means having a copy of your photos somewhere separate from your computer.  These are for emergency purposes.  I recommend using CD-Rs or DVD-Rs.  I buy the discs in bulk, they come 50 to a spindle.  I make a backup every month, of that month’s photos.  Then I put the backup discs on an old spindle and keep them in a cupboard.  I’ve been backing up photos and other important files this way for over 10 years.  I had occasion to look thru some of the older backup discs the other day, and the pictures were in perfect shape.

Here’s a step-by-step of how you might back up Pictures, using Picasa, for a whole year:

  1. Tools, Backup Pictures

  2. Click ‘New Set’ give it a name of 2009

  3. Check the box next to every folder of pictures in 2009 (that’s easy for me because I store all my pictures in folders by month)

  4. Picasa reports that I’ve selected 4,347 files and I’ll need 18 CDs or 3 DVDs.  I choose DVDs ( I use the DVD-R type)

  5. Put a DVD in the drive and click ‘Burn’

  6. Wait until it completes that DVD.  It will spit it out and display a message requesting the second DVD.  Then it repeats for the third.

  7. When it’s all completed, label the disks with a Sharpie marker then take the disks to another computer to test them.  There’s nothing worse than thinking you have good backups and finding out much later (when you need them) that they didn’t process correctly.  When you first put them in the drive, you should be prompted to do a Restore.  You don’t want to restore, you just want to look and see that the pictures are there, so cancel the restore prompt.  What you want to do is ‘Explore’ or ‘Open Folder to View Files.’  If you see that option, just choose it.  If not, you can go to My Computer and right click on the DVD drive, then choose Explore.  You should see a folder called $My Pictures. That’s where all your photos are. (Tutorial Videos:Backup your Photos to CD)


Do it!  Do it now!  Here’s a very short video I made a while back that goes thru the process:


This tip brought to you by Geeks on Tour

Geeks on Tour is a membership website with hundreds of Tutorial Videos on topics of interest to travelers, such as managing digital photos with Picasa, Route-Planning with Streets and Trips, and sharing your travels with a website using Blogger or with friends on Facebook. You can subscribe to our free e-newsletters, or become a paid member and be able to view all of the videos in the Learning Library.

Members may want to view the following tutorial videos.  Not a member?  Join now.


Tuesday, September 8, 2009

Dark Photo? Use Fill Light

You will love the fill light slider. Pictures you thought you needed to throw away can be saved. When a photo is dark, just drag the fill light slider (right on the basic fixes tab) towards the right and it will fill it with light!(Tutorial Videos: Basic Edits)

image

Just drag the slider to the right and it will take you


From this:

image

To this:

image
or From this:
image
To this:
image

This tip is taken directly from the ‘Beginner’s Guide to Picasa .’

If your original is *really* dark, the fill-light effect will make the photo grainy, reducing the quality.  But, hey!  It can make the difference between a photo that you would just throw out, to one that is viewable!


From this:
fill-1
To this:
fill-2

This tip brought to you by Geeks on Tour

Geeks on Tour is a membership website with hundreds of Tutorial Videos on topics of interest to travelers, such as managing digital photos with Picasa, Route-Planning with Streets and Trips, and sharing your travels with a website using Blogger or with friends on Facebook. You can subscribe to our free e-newsletters, or become a paid member and be able to view all of the videos in the Learning Library.

For Fun Members may want to view the following tutorial videos.  Not a member?  Join now.

Tuesday, February 24, 2009

Picasa Tip: Picasa Web Albums


  1. Picasa is free software for managing your photos on your computer.

  2. Picasa Web Albums is a free online photo-sharing website.


These two are both made by Google but they are completely separate.  People can upload photos to Picasa Web Albums even if they don't have Picasa on their computers.  And people can use Picasa to manage their photos without ever knowing about Picasa Web Albums.

BUT ...

They work together SO beautifully!

If you want to share your photos by putting them online, you have lots of choices: Flickr, PhotoBucket, Snapfish, Smugmug - to name just a few.  But, using Picasa to upload to Picasa Web Albums is by far the easiest way to do it.  You will need a Google account in order to use Picasa Web Albums.  It is your Google account that identifies your photos as yours.

Picasa Web Albums is located at www.Picasaweb.google.com.  Your web albums will be located at www.Picasaweb.google.com/youraccountname.  If you don't already have a Google account, the easiest way to do that is to sign up for Gmail.  Gmail is Google's free email system.  If you have a gmail account, that is also your Google account.

So ... if you have Picasa and you have a Google account, here's how you upload a photo to Picasa Web Albums:

picasaweb

  1. Select the photos you want to upload

  2. Click the upload button

  3. Review the options: name of web album, visibility of album

  4. Click Upload


You're done.  You should be able to go to www.picasaweb.google.com/youraccountname and see these photos.  And, as long as you selected 'Public' in the Visibility option, anyone else in the world can also see your photos at that location.  All you have to tell them is the web address: www.picasaweb.google.com/youraccountname.  If they can't see it, then it's probably because you left the Visibility option set to 'Unlisted.'  Unlisted is the default for that particular option.  See a previous GOT Picasa Tip on how to change the default options.

You can fix that.

While viewing the Web Album in question, click on Edit / Album Properties.  here is where you can change the option for Visibility.

visibility


Members may want to view the following tutorial videos.  Not a member?  Join now.

This tip brought to you by Geeks on Tour

Geeks on Tour is a membership website with hundreds of Tutorial Videos on topics of interest to travelers, such as managing digital photos with Picasa, Route-Planning with Streets and Trips, and sharing your travels with a website using Blogger or with friends on Facebook. You can subscribe to our free e-newsletters, or become a paid member and be able to view all of the videos in the Learning Library.

Tuesday, February 17, 2009

Picasa Tip: Import from Camera

Many people use the software that came with their camera to import pictures to their computers. That's fine. Picasa doesn't care how your pictures get onto your computer. As long as they get saved into a folder that is being watched by Picasa (like your Pictures folder), you will see them next time you open Picasa.

But you can use Picasa to do the import process as well. Then, you don't need the software that came with the camera. picture-autoplayAs soon as you plug in the cable from your camera to your computer, or insert the camera card into a card-reader in your computer, you should see a screen pop up that looks like this image. (Member Tutorial Video:Import from Camera)

You may have more options. You may even have another pop-up window from your camera's software. You can ignore, or close, any other popups and select 'Copy pictures and view them using Picasa3', as shown in the image at left.

Once you click on 'Copy pictures and view them using Picasa3', you will see the 'Import Tray.'

import-tray4Can you tell I'm writing this tip right after Valentine's Day?! The roses Jim gave me keep getting prettier every day. I just have to get out the camera and take a few more pictures as they unfold! I even got a little creative and laid my black bathrobe on the ground to make the background go away.

Ok, anyway ... this will take a minute for Picasa to see all the photos. Wait till you see the message 'Copying 15 of 15' - your number will be different - the point is that it has finished getting all of them. Then click on 'Import All.' Now you will see this screen:import-folder1

If you want these photos to get saved into an existing folder, you just click the Browse button and find the existing folder. If you want to put them into a new folder, you first make sure the 'parent' folder is selected in the 'Location' field, then enter the name of the subfolder you want to create in the top line. Make your choice for what to do with the camera card after the copy, and click 'Finish.' I usually choose the 'Safe Delete.' So, every time I use Picasa to transfer photos from my camera to the computer, the end result is a clean card to put back in my camera.

So now all my photos of the roses show up in Picasa and I can crop, sharpen, make collages and add text. Wanna see the end result?


Rose Collage

You can do it too --- watch the member tutorial videos. Not a member?  Join now.

This tip brought to you by Geeks on Tour

Geeks on Tour is a membership website with hundreds of Tutorial Videos on topics of interest to travelers, such as managing digital photos with Picasa, Route-Planning with Streets and Trips, and sharing your travels with a website using Blogger or with friends on Facebook. You can subscribe to our free e-newsletters, or become a paid member and be able to view all of the videos in the Learning Library.

Members may want to view the following tutorial videos.  Not a member?  Join now.


Wednesday, February 11, 2009

Picasa Tip: To Save or Not to Save

This is so odd. For all of my 25 years teaching computer software, I've repeated over and over again to "Save your work!" "Save often." With most software that is important. But, with Picasa I never use the Save command!

You really don't have to. Picasa remembers everything you've done to a picture. As long as you use Picasa, what you see is what you get. But, if you use another program to view that picture on disk it will see the original photo without Picasa's edits. To use a photo in another program, you must either Save, or Export. I use the Export command to create a new original. Export is the only way I can make the photo a different size as well.

Geeks on Tour Members can view Tutorial Videos on

Not a member?  Join now.

If you want to use the Save command, let me tell you how it works. I'll use the example of a photo I took of a hay field. I think it would be more artistically pleasing as a black and white, so I use the B&W effect in Picasa, and I see it in Picasa as a B&W photo. But, the original, color photo is still what's on the disk in My Pictures. If I use Powerpoint, for example, and import the Hayfield photo from disk, I'll get the color one.


Edited, how it appears in Picasa
hayrolls-bw
Photo file on disk
hayrolls-color

You can save your edits to disk by using File | Save, or by right-clicking on the photo and selecting Save. Now the photo file on disk will also be B&W, and therefore, if you use Powerpoint to insert the file, you will get the B&W version.

But, what if you should change your mind sometime and want the color one back? No problem, Picasa won't allow you to lose your original. When you use the Save command, Picasa creates a hidden folder called 'Originals' and puts your original, color photo in there. After you save a photo, Picasa's 'Undo' button will show, "Undo Save." If you click on that, Picasa will retrieve the original from the hidden folder and put it back in the file position.

originals

So, go ahead and Save if you want to! It doesn't hurt anything, you can always 'Undo' the save. It just takes up extra space on your disk for the originals. And, it certainly is less confusing when the pictures on disk are the same as what you see in Picasa!

Picasa even provides a button to save all the edits in any given folder. Look in the upper right corner of any folder in the Library view. In the example below, Picasa tells me it will save the edits on 88 pictures if I just click the 'Save to Disk' button. That would also put 88 originals into the Originals folder.

saveall
This tip brought to you by Geeks on Tour

Geeks on Tour is a membership website with hundreds of Tutorial Videos on topics of interest to travelers, such as managing digital photos with Picasa, Route-Planning with Streets and Trips, and sharing your travels with a website using Blogger or with friends on Facebook. You can subscribe to our free e-newsletters, or become a paid member and be able to view all of the videos in the Learning Library.


Members may want to view the following tutorial videos.  Not a member?  Join now.


Tuesday, January 27, 2009

Picasa Tip: Use Captions

A picture may be worth a thousand words, but a few words attached to a photo can say a lot too. Picasa makes writing captions so easy, you have no excuse not to identify them. Simply click in the space below the picture and type. No need to save - Picasa does that automatically when you move on or press Enter. All you need to do is just type ... you're done.(Member Tutorial Video: Add Captions to your Photos)

If you take just a moment to write a couple words with each of your important photographs, you will love yourself for it. Here are just some of the benefits of having captions written on your pictures:

  1. Every word in the caption is searchable

  2. Captions can be printed when you print the photo (new in 3)

  3. Captions appear in slide shows of your photos

  4. Captions will display with your photo when you upload them to Picasa Web Albums

  5. You can have captions display below the thumbnails of your photos in the Library view

  6. Captions are stored with the picture file itself, so are visible in many other programs.


If you like to share your life's stories and pictures with family and friends, but writing a blog is not for you, you may find that adding captions to your photos is all you need. I generally type a caption on every photo I upload to my Picasa Web Albums. Here is a sample:

Captions in Picasa and Picasa Web Albums

If you click on the image above, it will take you to the actual web album. Then, find that picture of Jim teaching Google Earth and click on it. You will see that captions don't have to be limited to a few words. I typed a whole paragraph on that one!
This tip brought to you by Geeks on Tour

Geeks on Tour is a membership website with hundreds of Tutorial Videos on topics of interest to travelers, such as managing digital photos with Picasa, Route-Planning with Streets and Trips, and sharing your travels with a website using Blogger or with friends on Facebook. You can subscribe to our free e-newsletters, or become a paid member and be able to view all of the videos in the Learning Library.

Members may want to view the following tutorial videos.  Not a member?  Join now.

Sunday, January 15, 2006

Managing Digital Photos with Google's Picasa

I've been using a variety of computer software, and teaching others how to use it, since 1983. I've taught everything from DOS, to WordStar, to WordPerfect, PageMaker, Microsoft Access, Visual Basic, and dozens of others in between. I have never seen anything as quick and easy - and powerful - as Google's Picasa...

And it's *FUN*. And it's *FREE*.

I first looked at Picasa a year or so ago. The first thing I noticed is that it doesn't display the 'tree' structure of your folders. I didn't like that, so I never explored the program further. For a variety of reasons, I decided to look again. It still doesn't show the tree structure, but it makes it SO easy to find your photos that I understand the reasoning.

With Picasa2, I can guarantee you will find photos on your computer that you had forgotten all about. It makes it so easy to email, print or post photos to the web. It also has several ways that you can enhance your photos - cropping, color enhancements, and effects that make your photos look great. And, it does all this without touching your original, so you're safe to play with the effects to your heart's content.

I was able to put together a 2 hour seminar that covers the majority of the programs features. The short length does not reflect on the lack of feature, rather, it reflects on how quick and easy the features are to use. If you'd like to review those features, you can download my outline here. Just please use it for personal purposes only.

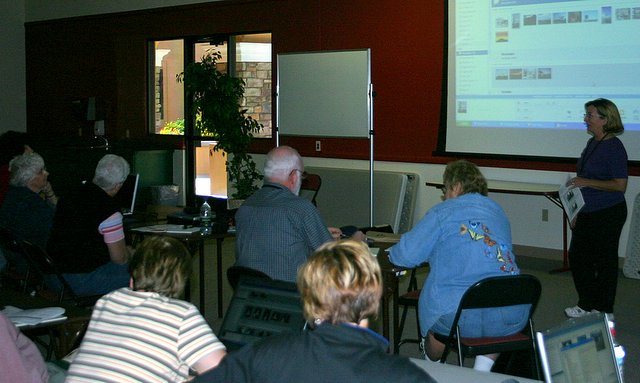
We gave the seminar at Palm Creek last weekend and a few people brought their laptops with them. Even during the class, they found pictures they had forgotten about, and they really had fun enhancing them. The following photo was taken during class, transferred from the camera to the computer (using Picasa) and posted to this Blog simply by clicking on the 'Blog This' button. Try it! You'll like it!